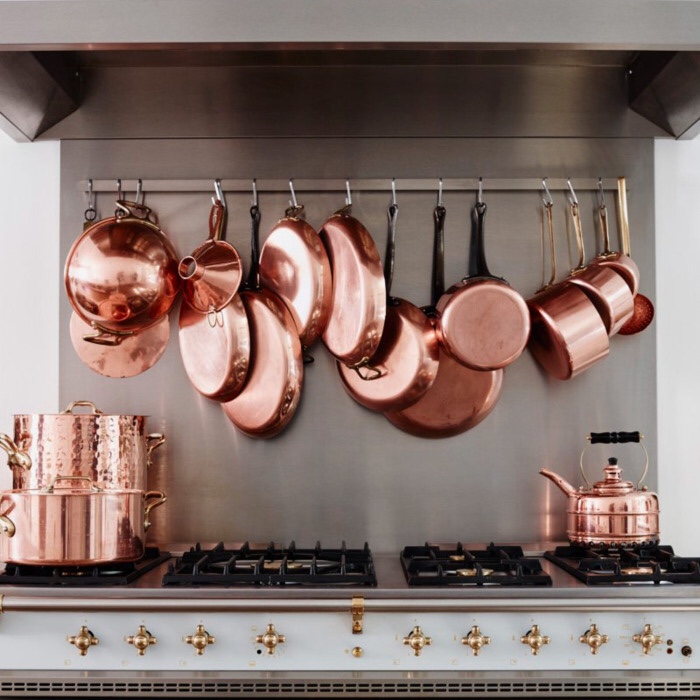
Preservation Techniques

Definition: Keeping Of perishable foods in a consumable form for a long period of time.

Dehydration: Draws moisture from the product and eliminates any medium for bacteria. Used for fruits, herbs, beans and other vegetables.

Alcohol: Alcohol kills active microorganisms. Used for fruit.

Sugar: Density of sugar retards the growth of enzymes due to a lower ratio of water. Usually 60% sugar in preserves. Used with fruit.

Liquid Cure / Brine: Submersion Of Food in a brine, an intense solution of water combined with salt and sometimes additional spices.

Pickling / Fermentation: Preserves Food by impregnating it with acid.  Vinegar is common and creates an environment that encourages fermentation. The item is generally precooked or soaked in a brine to draw out excess moisture.

Dry Cure / Salt: Surfaces are rubbed with salt and then left to cure. Usually a preliminary step to smoking, as are liquid cures.

Cold Smoking: Item is first cured, usually in a brine. Smoke is applied at a temperature bellow 100 degrees (38 degrees Celsius). Product remains uncooked. Example Scottish smoked salmon.

Hot Smoking: Cooks the product with the heat of the smoke. Item is usually cured first. Chicken, turkey, pork and trout are often hot smoked.

Pasteurization: Rapidly cooling liquid that has been heated to 180 degrees. Primarily used for milk and cream.

Sterilization: The container is sterilized before it is filled. Filled container is then brought to a high temperature. Safe for long term storage. Primarily used for canning fruits and vegetables.

Refrigeration: Enzyme activity is slowed at 32-38 degrees. Humidity level must be controlled.

Freezing: Holding temperature must be below 0 degrees. Changes the texture of the thawed product due to water evaporation.

Quick Freezing: Products are immediately cooled to -40 degrees and held at -4 degrees.

Freeze Drying: Total elimination of all moisture, repeated freezing and dehydrating. Product does not require refrigeration. Used for coffee, potatoes.

Sealing & Coating: Confit is a classic example. Today it is used more for taste than preservation.

Vacuum Pack: aka cryovac.  Eliminates all air from a plastic bag or container.

What is a Traditional Bouquet Garni?


A bouquet garni is a classical combination of aromatic herbs and vegetables used to flavor liquids.  They can be removed easily from the liquid once they’ve given their flavor to it.

  • 3 outer green leek leaves, washed
  • 5 sprigs Italian parsley
  • 5 sprigs thyme
  • 2 bay leaves

Laying out 1 leek green, set the herbs on top and wrap in the remaining leaves to form a circular little bundle. Tie the bouquet garni securely with string.

If you decide to wrap the herbs in cheesecloth then you have a sachet.

Salt: When, Why, How much – A Primer

There are so many kinds of salt available now that it’s become difficult to know which to use for what. Some generalizations can be made:

  • A box of inexpensive kosher salt is ideal for salting large amounts of water for boiling vegetables or pasta.
  • Fine salt, either bought fine or ground, is best for seasoning foods in which the crunch of coarse salt would be too much.
  • Sea salt, ideally the rather gray looking sel de Guérande, contains essential minerals and a delicate marine flavor.
  • Fleur de sel is ideal in tiny pinches placed on delicate foods.

What is fleur de sel?

Fleur de sel is a kind of sea salt that is harvested in some parts of France by trapping sea water in lagoons and letting the water dry. As the water evaporates, salt begins to form on the surface of the pond in a characteristic flower pattern. The salt is raked off, allowed to dry slightly more, and marketed as fleur (“flower”) de sel. If you look closely at a pinch of fleur de sel, you’ll see that it’s made of flat crystals.

Fleur de sel has a delicate flavor and looks great on top of small servings. It’s expensive, so use it at the end.

When do I add salt?

It varies, if you have plan ahead, season fish and meat a couple of hours before cooking and then pat them dry before browning. This gives the salt time to penetrate the food. Because salt draws water out of foods, which can interfere with browning, the foods need to be patted dry.

If you don’t have time to salt meat ahead of time, salt just before browning or just before serving.  Broths and sauces should be salted just before serving in case you want to reduce them to concentrate them. Boiling down liquids increases the concentration of any salts they contain.

Why is some sea  salt wet?

Sea salt is what’s called hygroscopic (a substance tending to absorb moisture from the air).  To prevent this, some companies add a magnesium compound to the salt to keep it dry. This also makes it easier to pour.

Your Knife Roll

Chef’s (or French) Knife: Used for chopping, slicing, dicindand filleting. Blade 6-14 inches.

Utility Knife: Used for coring vegetables and slicing tomatoes and other fruits and vegetables.

Boning Knife: Used to bone various meats and poultry.  Blade is 6-7 inches and curved.

Fillet Knife: Used to fillet fish.  Flexible blade.

Slicing Knife: Used for slicing large cuts of meat or fish. Blade 12-16 inches.

Paring Knife: Small blade Used for peeling and turning vegetables.

Serrated Knife: Bevel edge blade for slicing breads.

Honing Steel: Hardened, ridged rod to keep blade aligned.

Sharpening Stone: Stone in a variety of grits used to sharpen knives.

Knife DNA 101

The Cutting Edge the sharpened, honed edge of the blade. It should be razor sharp. Chef’s knife blades come in varying degrees of curvature, designed for various tasks, such as cutting, slicing, filleting, butchery.

The Back, or Spine, is the long side opposite the sharp blade. This is where you hold your non–knife hand when rocking the knife back and forth for rapid mincing. It can also be used as a makeshift bench scraper for moving pieces of food around on your cutting board. Never use the knife cutting edge for this.

The Tip is the sharp point at the end of the blade. It’s used for precision work.

The Heel is at the bottom of the blade. In Western-style knives, the metal thickens significantly at the heel. This is to make it easier to grip.

The Bolster is the part of the blade that meets the handle. It is thick and heavy, providing a good balancing point for the blade and the handle. The center of mass should be somewhere near the bolster, so that you can rock the knife back and forth with minimal effort.

The Tang is the extension of the blade that runs through the handle. It provides balance as well as sturdiness.

The Handle is where your hand rests if using the handle grip, or where your three smaller fingers rest if using the blade grip. Handles can be made of wood, polycarbonate, metal, or various exotic materials.

The Butt is the fattened section at the very bottom of the handle.

Restaurant French Cooking Vessels

Materials:

  • Copper: Most even heat conductor.
  • Aluminum: Excellent heat conductor.
  • Cast Iron: Extremely strong and heavy metal used for Dutch ovens, griddles, frying pans, and skillets.  Relatively inexpensive and long lasting.
  • Black Steel: Inexpensive and heat conducts quickly. Often used for frying pans, crepe pans, and woks.
  • Stainless Steel: Excellent non-reactivate metal, but extremely poor heat conductor.
  • Enamelware: Inexpensive, but a poor heat conductor and food tends to stick.
  • Nonstick: Useful, however the coating tends to wear off quickly.

Batterie de Cuisine (Pots and Pans):

  • Marmite: A stockpot 2.5 – 40 gallons
    • Marmite Haute: Tall
    • Marmite Basse: Shorter
  • Poêle: Shallow Pan used for cooking omelettes, crepes, and potatoes. American version is a cast iron skillet.
  • Rondeau: Large round pan with handles, used for braising and stewing.  5 – 6 inches deep.  12 – 20 Quarts.
  • Rôtissoire: Large rectangular pan with low to medium high sides and two handles used for roasting meats.
  • Russe: Saucepan with a single long handle.
  • Sauteuse: Round, shallow pan with a single long handle and sloping sides used for sauté.
  • Sautoir or Plat a Sauter: Large, round, shallow pan with a single long handle and straight sides that is used to sauté or make sauces.
  • Sheet Pan: Rectangular pan with shallow sides.
    • Full Sheet Pan: 18 x 26.
    • Half Sheet Pan: 18 x 13.
  • Hotel Pan: Rectangular stainless steel pan with a lip designed to rest in a steam table or rack. Used to cook, ice, store or serve foods.
    • Full Hotel Pan: 12 3/4 x 20 3/4, 2, 4, or 6 inches deep.
    • Half Hotel Pan: 1/2 the size of a Full.
    • Third Hotel Pan: 1/3 the size of a Full.
    • Fourth Hotel Pan: 1/4 the size of a Full.
  • Square Boys: Also known as steam table pans. 6 7/8 x 6 1/4.  2 1/2, 4 or 6 inches deep.
  • Sizzle Pans: Oval platters with raised edges used to cook or finish items in the oven or salamander. 9 – 13 1/2 inches.

Thinking Of Opening A Restaurant: Equipment

Large Appliances

Stoves:

Open Burner: Direct, adjustable heat.

Flat Top: Thick Steel plate over the heat source that provides indirect heat.  Requires flat bottomed cookware and time to adjust settings.

Ring Top: Concentric rings and plates that can be removed to expose the burner.  Indirect or direct heat.  Has a higher BTU than an open burner.

Conventional Oven: Indirect heat source located at the bottom with adjustable shelves.

Deck Oven: Food is set directly on oven floor.  Single or multiple levels available.  Think pizza oven.

Convection Oven: Fan blows hot air through oven allowing food to brown more efficiently.  Often used for pastries and baked goods.

Combi Oven: Temperature, moisture content and air flow may be controlled.  Used for cooking and holding food.

Salamander: Open Box like apparatus with heat source located in roof.  Generally used for intense browning (glacages)

Grill: Heating source (built in or added) is located below a heavy duty cooking rack.

Walk-In Refrigeration: Used for cold storage or freezing.

Reach-In Refrigeration: Larger version of a home refrigerator/freezer.

Under Counter Refrigerator and Refrigerated Drawers: Used primarily around the work areas.  Some drawers designed to hold specialty products such as fish.

Small Appliances

Ber Mixer: Immersion blender either electric or battery powered.

Electric Blender: A machine that purées, Emulsified and crushes. Composed of a solid housing containing motor base and the blending jar  Never fill more than 2/3 full.

Electric Food Chopper or Buffalo Chopper: Heavily built machine with a rotating bowl that passes under a hood where vertical blades chop the food.

Electric Food Processor: Heavy motor encased in plastic or metal housing with a detachable bowl and cover and various blades with specific functions.  It can chop, blend, mix, purée, knead, grate, slice and julienne.

Electric Meat Grinder: Freestanding motor housing, as well a feed tray, and blades of varying sizes.

Electric Meat Slicer: Substantial machine with a metal encased motor as the foundation and a circular cutting blade attached.

Mandoline: Hand slicer supported by folding legs with a number of different sized blades used to cut vegetables into a variety of shapes, sizes and thicknesses.

Steam Jacketed Kettle: Used to make large quantities of stocks, soups, sauces and pastas.  Two quarts to one-hundred gallons.  Steam circulates through the kettle walls to provide heat.

Tilting Shallow Kettle: Large stainless steel unit with a hinged lid for making large quantities of sautés and braises.

Hand Tools

Channel Knife (Canneieur): Small Knife used to channel fruits and vegetables into decorative patterns.

Chef’s Fork: Longer handled, longer toned fork that keeps the chef’s hand from the heat.

Chinois: Conical strainer with a handle.

Chinois Etamine: Bouillon strainer.  Constructed with fine metal mesh.

Perforated Chinois: Used when fine straining is not necessary.

Food Mill: Metal basket utensil with interchangeable discs and hand crank used to separate solids from skins, seeds, etc.

Kitchen Scissors: Sturdy shears to cut butcher’s twine. Or kitchen paper or for trimming fish or poultry.

Needle Nosed Plyers / Tweezers: Used to remove fine bones from fish.

Parisienne Scoop: Melon baller.  Used to cut fruit or vegetables into small balls.

Pastry Spatula: Long thin spatula used to assist in cake decoration.

Ricer: Basket or cone shaped utensil with small holes and a plunger used to force small foods into grains.

Scales: Essential in pastry making.

Scrapers: Numerous styles:

Metal Bench Scraper: To clean off workspace.

Plastic Bowl Scraper: To remove dough from mixing bowls.

Spatulas: Large metal ones used to flip vegetables, meat, poultry.  Rubber, composite, wood spatulas also used for various techniques.

Spider: Long handled device with a shallow almost bowl like shaped disk of mesh or perforated wire.

Spoons: Wide variety of sizes and shapes and materials.

Stem Thermometer: Measures degrees through a metal stem two inches from the tip.

Tamis: Used for fine straining of liquids, aka tammycloth.

Tongs: Helpful in turning, lifting and plating food without puncturing it.

Trusing Needle: Long skewer like needle used to truss poultry.

Vegetable Peeler: Small fixed or pivoting blade with a handle used to peel vegetables and fruit.

Whisks: Thin, flexible wire whips used to incorporate mixtures. Balloon whisks have large somewhat spherical centers to incorporate air into foods such as egg whites.

Collard Greens

“Collard greens grow throughout the South and, probably as much as any other food, serve as a culinary Mason-Dixon line. Some claim greens kept Sherman’s scorched-earth policy from totally starving the South into submission; many today can testify to surviving Depression winters with greens, fatback, and cornbread. Southern childhood memories often focus on collard greens: either the pleasant, loving connection of grandma’s iron pot and steaming potlikker, or the traumatizing effects engendered by the first whiff of the unmistakable odor for which greens are famous. Writing in the Charlotte Observer in 1907, Joseph P. Caldwell explained, “The North Carolinian who is not familiar with pot likker has suffered in his early education and needs to go back and begin it over again.” Particularly among rural and poor southerners, collard greens have endured as a dietary staple.

Sometimes defined as headless cabbages, collards are best when prepared just after the first frost, though they are eaten year-round. They should always be harvested before the dew dries. When being prepared, they are “cropped,” then “looked,” then cooked; that is, cut at the base of a stalk, searched for worms, and then cooked “till tender” on a low boil, usually with fatback, or neck or backbone, added. The resultant “mess o’ greens,” topped with a generous helping of vinegar, can easily make a meal in itself. If they are summer greens (and much tougher), the tenderizing could take two hours or more of cooking; after first frost, it may take less than an hour. A whole pecan in the pot should eliminate the pungent and earthy smell. Potlikker, the juice left in the pot after the greens are gone, is a southern version of nectar from the gods and is valued both as a delicacy—particularly when sopped with cornbread—and for its alleged aphrodisiacal powers. Greens combine well with black-eyed peas and hog jowl in the South’s traditional New Year’s Day meal. To ensure good fortune, one should either eat lots of greens or tack them to the ceiling. In fact, a collard leaf left hanging over one’s door can ward off evil spirits all year long.

Though collard greens are grown year-round throughout the South and Southwest (Indians call them quelites), they are most prevalent in the Deep South and the eastern plains of North and South Carolina. The exporting of collards to displaced southerners in the Northeast has become a big business in the three leading collards-producing states. From the last week of October through May, eight firms from Georgia and the Carolinas ship a thousand tons of whole, fresh collards a week to the major northeastern metropolitan areas. The greens are cut and banded, then packed in bundles on ice, about 25 pounds per box or 20 tons a truckload.”

~ Alex Albright, East Carolina University. Excerpt From “The New Encyclopedia of Southern Culture”, John T. Edge (Editor)

Okra

“I remember rediscovering okra as a young chef. One of the farmers who delivered our summer produce invited us to his farm for a visit. I had never seen okra growing in the field before, and was mesmerized by the sight: verdant rows of lanky stalks with broad leaves and gorgeous, hibiscus-like flowers blooming alongside ridged, finger-like pods pointing toward the sun. He clipped off a young tender pod and bit right into it, next offering me one. It was sweet and crunchy, and warm from the afternoon heat. I had only ever tried okra cooked and was stunned at how good it was raw, straight from the plant.

Until then, I had never thought much about okra beyond the traditional fried and stewed versions, which can both be either amazing or horrible depending on how they are prepared. Now it’s one of my favorite summer vegetables to work with. It is incredibly versatile: crisp and sweet when raw, sumptuous and meaty when roasted or sautéed, addictive when dipped in cornmeal and deep-fried. It builds layers of flavor and texture when stewed in soups and gumbos.”

~Steven Satterfield

Okra is a flowering plant like its cousins cotton, cocoa, and hibiscus, loves poor soil, unpredictable rains, and heat. It does not like frost, which is why many living above the Mason-Dixon Line are unfamiliar with its goodness or view it with suspicion.  So much of the world relishes it. In India it is called “lady fingers.” Africans frequently call it “gumbo,” a term that has taken root in Louisiana and other Cajun areas as well as in the Gullah region of South Carolina and Georgia.

Purchasing: When buying okra, look for the smallest pods. By the time larger pods are cooked, they are much less palatable. If the smaller ones are not available, slice the larger ones on the diagonal before preparing.

Cornmeal Fried Okra

Fried okra is served everywhere in the South, but that doesn’t mean it’s always good.  Same goes for stewed Okra and Tomatoes.

2 pounds fresh okra, smallest size preferred, washed
½ teaspoon kosher salt
3 quarts good frying oil
2 cups extra-fine cornmeal
5 tablespoons cornstarch
1 teaspoon fine sea salt, plus more to taste

Trim the tops off the okra and slice the okra in half. Place the trimmed okra in a dish and pour 1 cup water over it, then sprinkle with ½ teaspoon kosher salt. Agitate the okra in the water and let it sit 10 to 15 minutes. While the okra is soaking, using a frying thermometer, slowly heat the oil to 350°F.

In a bowl, whisk together the cornmeal, cornstarch, and sea salt. Pull a handful of okra from the dish and allow it to drain in your fingers a few seconds, then drop the okra slices into the cornmeal mixture. A metal skimmer works well.  Toss to coat well, remove the okra from the dredge and sift the excess dredge away, being careful not to knock off too much coating. Repeat the dredging process until all the okra is coated and ready to fry. Working in batches, drop the coated okra into the hot oil and fry until crisp and golden, around 5 minutes. Do not overcrowd the pot. Transfer the hot okra to paper towels to drain, and sprinkle with more fine sea salt.

Serve immediately.